In the landscape of modern networking, managing traffic, enhancing security, and improving the performance of a network are crucial. Virtual Local Area Networks (VLANs) provide a strategic solution by segmenting a physical network into multiple logical networks. Today, I will delves deep into the concept of VLANs, explaining their importance, setup, and management, with a focus on breaking down broadcast domains to enhance network efficiency.
Understanding VLANs and Broadcast Domains
- What is a VLAN?
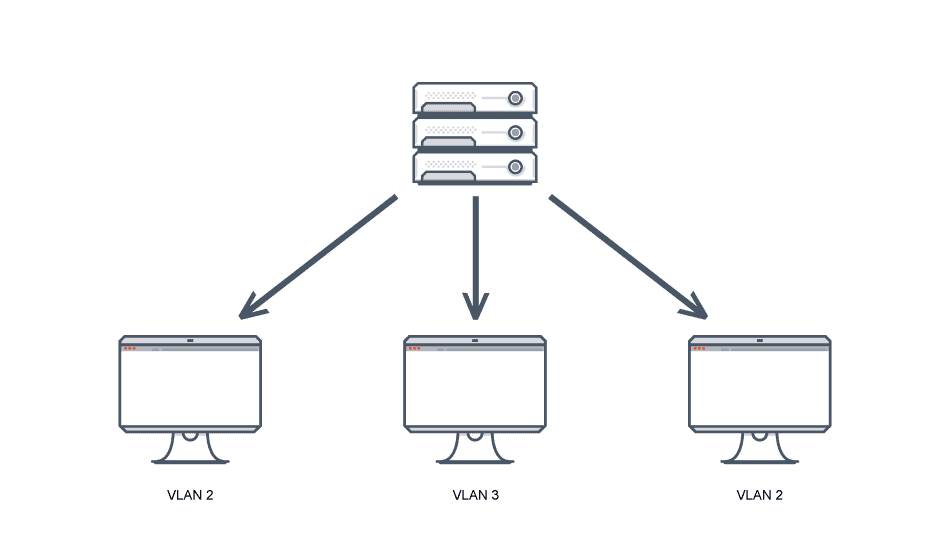
- A Virtual Local Area Network (VLAN) is a logically segmented network within a physical network. VLANs enable network administrators to group hosts together even if they are not directly connected to the same network switch, and manage policies applied to each group.
- What is a Broadcast Domain?
- A broadcast domain is a network segment that allows broadcasts to be sent to all devices within that segment. Broadcasts are necessary for network operations, but they can lead to congestion and security vulnerabilities when not managed correctly.
- Benefits of VLANs:
- Security: VLANs provide an additional layer of security by isolating sensitive data and devices into separate logical networks.
- Performance: Segmenting a network into VLANs reduces the size of broadcast domains, decreasing the likelihood of broadcast storms and improving overall network performance.
- Flexibility and Efficiency: VLANs allow for logical grouping of users or services, which can be easily managed and configured without the need to change the physical layout.
Planning for VLAN Deployment
Identifying VLAN Requirements
The first step in VLAN deployment is to assess the specific needs of your organization that can be addressed by VLAN segmentation:
- Departmental Segmentation: Each department (e.g., Marketing, HR, IT) may have different network resource requirements and security concerns. Segregating traffic at the network level keeps data flows manageable and secure.
- Performance Management: Certain areas of your network may require high bandwidth and low latency. VLANs can prioritize traffic such as real-time voice and video, improving the performance of critical applications.
- Security and Compliance: Sensitive data, such as payment information and personal details, can be isolated in a VLAN that has enhanced security measures to comply with regulatory requirements.
- Guest Services: Isolating guest services from internal operations ensures that visitors can access the internet without posing a risk to core business systems and data.
VLAN Design and Numbering
Creating an effective VLAN design involves logical planning and organization:
- Numbering Scheme: Choose a VLAN numbering scheme that aligns with your organizational structure. For example, all VLANs related to the IT department could be in the 100 series (e.g., VLAN 101, 102), while HR could be in the 200 series (e.g., VLAN 201, 202).
- Geographical Considerations: In geographically dispersed organizations, VLANs might be structured around physical locations. For instance, each floor or building could have its VLAN identifiers.
- Usage-Based VLANs: Some VLANs might be defined not by user group or location, but by the type of use, such as data, voice, or video VLANs. These are often set up to ensure quality of service (QoS) for bandwidth-intensive applications.
Documentation of VLAN Configurations
Proper documentation is crucial for the effective management and troubleshooting of VLANs:
- VLAN Assignment Table: Create a detailed table listing each VLAN, its purpose, and which ports are tagged or untagged with each VLAN.
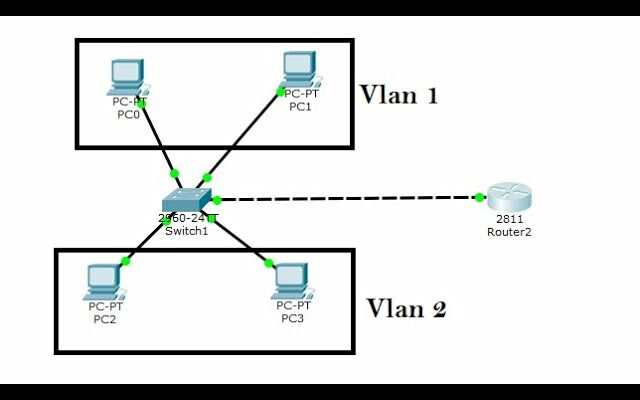
- Network Diagrams: Update network diagrams to reflect VLAN configurations, including routers, switches, and the endpoints. Indicate the paths that inter-VLAN traffic will traverse.
- Change Logs: Maintain a change log documenting when VLANs are created, modified, or removed. This log should include reasons for changes to help track the evolution of your network setup.
Configuring VLANs on Network Switches
While specific commands and interfaces can vary between hardware manufacturers, the general process of configuring VLANs on a switch involves several key steps:
- Accessing the Switch Configuration Interface:
- Connect to your switch via a console cable, SSH, or telnet.
- Enter privileged EXEC mode by typing
enable, followed by your password, then access global configuration mode withconfigure terminal
- Creating VLANs:
- Use the command
vlan [VLAN_ID]followed byname [VLAN_NAME]to create each VLAN. For instance:vlan 10name Marketing - Repeat for all VLANs required in your design.
- Use the command
- Assigning Ports to VLANs:
- Navigate to the interface configuration for each port and assign it to a VLAN using:
interface [interface_id]switchport mode accessswitchport access vlan [VLAN_ID] - For example, assigning port GigabitEthernet0/1 to VLAN 10 would look like this:
interface GigabitEthernet0/1switchport mode accessswitchport access vlan 10
- Navigate to the interface configuration for each port and assign it to a VLAN using:
- Configuring VLAN Trunking:
- On ports that connect switches or that lead to routers, configure trunking to allow traffic from multiple VLANs:
interface [trunk_interface_id]switchport mode trunkswitchport trunk allowed vlan add [VLAN_IDs] - For instance, allowing VLANs 10, 20, and 30 on a trunk port:
interface GigabitEthernet0/24switchport mode trunkswitchport trunk allowed vlan add 10,20,30
- On ports that connect switches or that lead to routers, configure trunking to allow traffic from multiple VLANs:
Conclusion
The deployment of VLANs is a powerful strategy for enhancing network functionality, performance, and security. Whether you are using Cisco switches or another brand, the principles of VLAN configuration remain consistent. Proper planning, careful configuration, and thorough documentation are essential to ensure that VLANs serve their intended purposes effectively, providing a scalable and manageable network infrastructure.